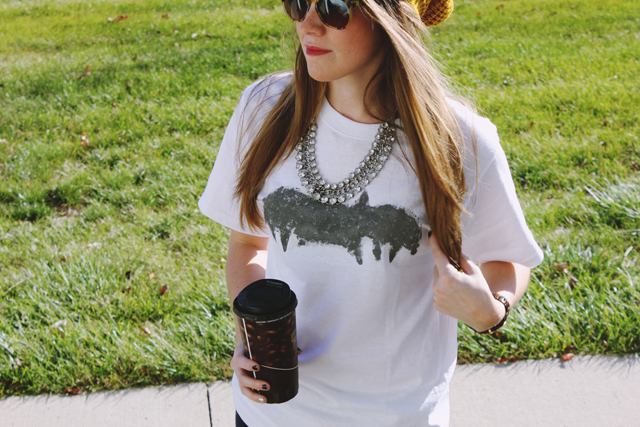
I've come to love the graphic tee trend that has hit the streets this fall. Knowing that it isn't in my budget to spend a fortune on these tees, I decided to take the DIY route; recreating my favorite graphic t-shirts at a fraction of the price.
My first DIY tee was this Zoe Karssen Bat Tee {see another DIY recreation here}. I've been coveting Zoe Karssen's tees for the longest time and love seeing how other bloggers have styled their tongue & cheek tees {see Alicia styling her bat tee here}. Paired with a great jacket and fun beanie. A tee made for October. I can see myself pairing my creation with a blazer, jeans, and booties to pass out Halloween candy this year!
Supplies: Newspaper {for stencil} // Sharpie // Foam // Martha Stewart Metallic Silver Metallic Black Paint // White T-Shirt
**I picked up all my supplies at my local Michael's and the foam from JoAnn's.
Either free-hand the bat from Zoe Karssen's tee or print off your desired design {I free handed my bat image}. Cut out stencil and trace onto foam. The foam I bought was less than an inch thick, which made it easy to trace and cut out.
Mix the silver and black paint. I started with large dollop of silver and a few drops of black. I slowly added more black paint to get the desired color.
Place the stamp into the plate of paint. If this doesn't work, use a paint brush to coat the stamp with paint, but not to excess. I used Martha Stewart's Stencil Brush. Make sure to paint around all of the edges to maintain the 'bat' shape.
Place the foam pattern exactly where you want it on the shirt. Press down firmly. Make sure to press down around the edges and within the middle of the pattern. Slowly remove the foam pattern. Use the stencil brush to darken missed spots. If you want a more distressed look, only lightly touch up the design. This will allow you to match the faded/distressed look of the original shirt.
Let dry & wear!
Stay tuned tomorrow for another great DIY inspired by this post!


